harvey wrote:I was interested in the article "Faking a polarizer using RAW" on photoclubalpha.com but I have the opposite problem. How do I balance out a sky that is too uneven due to a part of it being more affected by use of a polarizer?
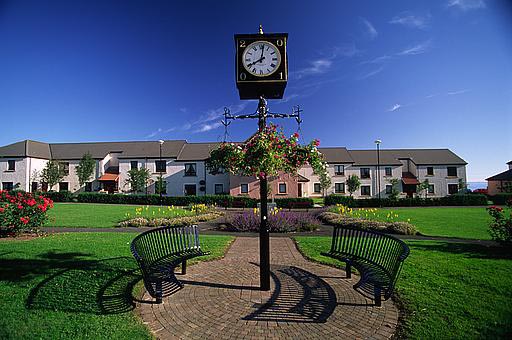
Here is an example image to show the problem:
[ image elided ]
I have Photoshop CS2 and the closest I can get is by using the replace color image adjustment but it is not very good. I'm wondering if I need a filter that would lighten/darken or saturate/desaturate towards a chosen reference.
Any suggestions on the best way to do this?
Harvey
Best is hard to say. One possibility is to select the sky area (probably with the magic wand), then create a new adjustment layer of the "Invert" type (checking the box for "use selection to create layer mask", or whatever it's called) and with the blend style set to "luminosity". With its opacity set to 50%, you'd get precisely uniform density throughout, with some gray toward the center where it was almost black, blending to a uniform blue for the rest. Chances are you still want some variation in density though -- at something like 30% opacity, it looks to me like a fairly believable approximation of a normal blue sky.
 Viewed 3351 times")
Then again, I live at high enough altitude that my "normal blue sky" is probably a bit darker and more saturated than most people's, so further adjustment may be needed. Once you've used this layer to get the uniformity about right, you may want to add another hue/saturation layer to reduce those as needed (for me, saturation at -12 and lightness at +24 looks more like I expect at somewhat lower altitude, but this is going from memory, so it's probably quite a ways off).
Looking at the preview, it looks like I missed selecting a small rectangle of the sky at the bottom, right-hand corner of the clock, but this should still be enough to get the general idea.